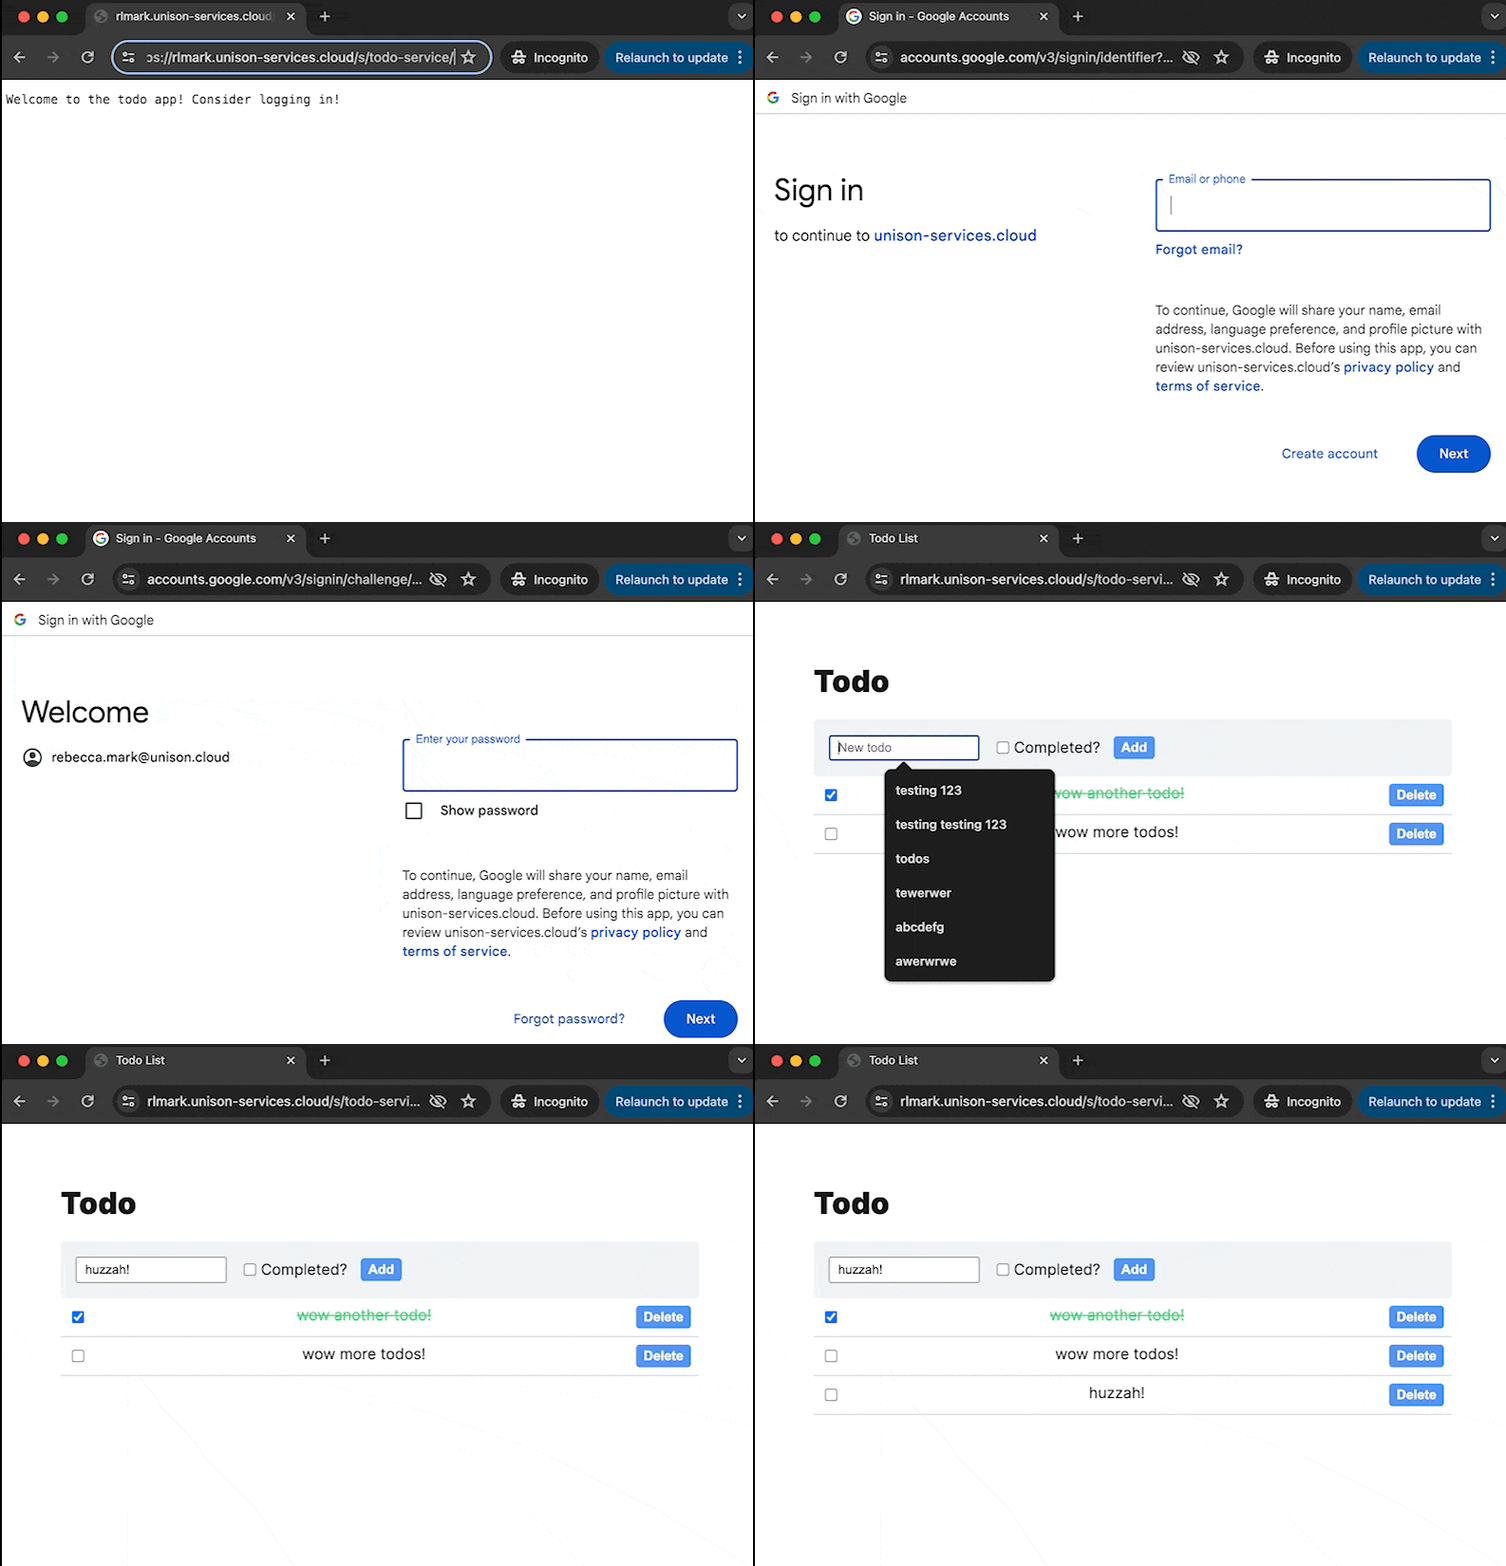
In this exercise, you'll add authentication logic to an existing HTTP application. By the end of this exercise, you'll have implemented a sign-in flow that looks like this:

The todo app in this exercise is already set up with endpoints to create and update todos, however, it lacks a working user model. Currently, everyone can see and modify everyone else's todos! Let's add OAuth2 (with authentication provided by OpenID connect) to the app so that each user can only see and modify their own todos.
🍏 What you'll learn
- A wee bit about OAuth 🤏
- How to incorporate the
Authability in HTTP service logic - The conventions and configuration options for the
Authability - Cookie signing and other security considerations for secrets
- An example walk-through for configuring an identity provider
The wonderful Auth library ecosystem provides authentication support for the Cloud. The libraries you need are already installed in the cloud-start project, but if you were starting from scratch, you should lib.install the following:
- The
Routeslibrary - For writing HTTP service endpoints - The
Authlibrary - A simple, Routes-library-friendly interface for authentication - The
OAuth2library - Contains helper functions for configuring Google, Github, etc. - The
JWTlibrary - For decoding JSON Web Tokens
Why we need OAuth and the Auth ability
Currently, the todo app has the following routes:
- PUT
/todo- Creates a new todo item - GET
/todos- Lists all the todos - GET
/todo/:todoId- Gets a specific todo item - DELETE
/todo/:todoId- Deletes the todo item
It also has a home page at "/" which provides a (very rudimentary) form for administering todos.
The todo app is backed by a simple Cloud database which stores the items keyed by a stub UserId text value. We do not want to have to create and maintain a "User table" that maps the UserId to usernames and passwords, so we'll rely on OAuth to avoid the security pitfalls of credential management.
📚 OAuth2 is a security standard where a user allows an application granular access to their data via another "authorization service." With OAuth in place, the client application does not need to store user credentials and instead relies on a back-and-forth exchange of tokens for verification. OAuth is an authorization protocol, meaning it describes what resources a user has access to, not user identity, but it can also be been extended to handle authentication with OpenID Connect.
OAuth can be… complex. 😵💫 Fortunately, the Auth ability abstracts away much of it for us!
ability Auth session where
  requireSession : {Auth session} session
  getSession : {Auth session} (Optional session)
Let's break down the Auth ability in terms of how you'll use it in an app:
- The
sessiontype parameter can be any type that your application uses to represent a logged-in user. This type becomes a cookie that the user's browser stores upon sign-in and sends back with each request. requireSession : {Auth session} session- Initiates a user session—this function starts the auth process if a user hasn't logged in already or returns the active session if they have.getSession : {Auth session} (Optional session)- Used for guarding routes—it returnsSomesession if the user is logged in, orNoneif not.
The Auth ability defines a simple interface for use in your service logic, but it requires a handler that specifies details like what platform the user should sign in with. You'll need to register your app with an external OAuth provider and configure it to match. The subsequent parts of this exercise break down that process.